It’s easy to take lots of photos on vacation these days, and while a slideshow of all of them is a bit much, friends and relatives might like to see a Best Of collection. Or you might wish to share baby photos with your family or pictures of your new city with friends back home.
With iCloud, it’s easy to create a shared album and to invite other iCloud users to subscribe to it (handy for viewing on an iOS device or Apple TV). It’s also easy to create a public Web page of photos that anyone can see, even if they don’t use any Apple devices.
First, some setup:
- If you’re using an iOS device, go to Settings > Photos & Camera, scroll down if needed, and turn on the iCloud Photo Sharing (not iCloud Photo Library!) switch.
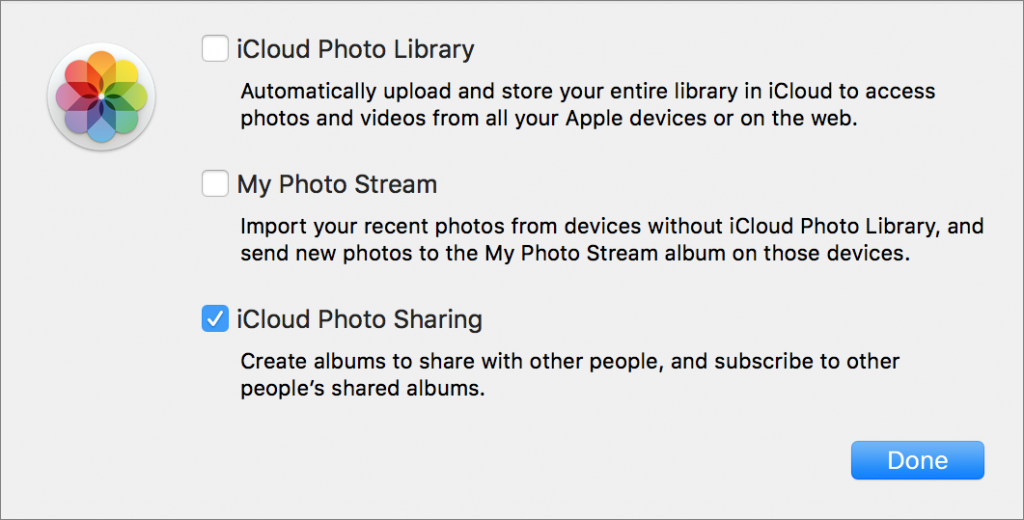
- On a Mac, open System Preferences > iCloud, click the Options button next to Photos, select iCloud Photo Sharing, and click the Done button.
Next, follow these steps, which are similar regardless of the device you’re using:
- In the Photos app, select some photos or videos. In iOS, that involves tapping Select before tapping the items to select; on the Mac, Command-click the items you want or drag a selection rectangle around them.
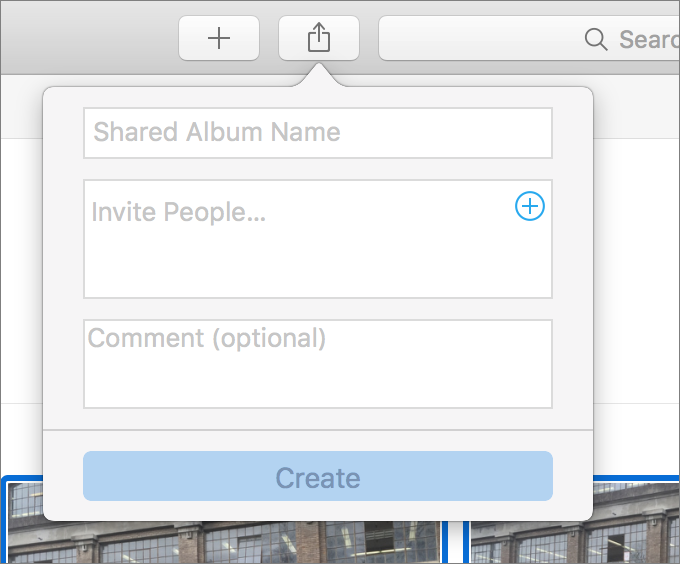
- Hit the Share
 button and pick iCloud Photo Sharing.
 - Select an existing album, or create a new shared album (in iOS, tap Shared Album to see the New Shared Album command).
- For a new album, provide an album name, enter the names or email addresses of any iCloud users with whom you want to share the album, and add an optional comment. In iOS, tap Post; on the Mac, click Create.
To add more photos, you could repeat the steps to select photos and then add them to the shared album. But it may be easier to start with the shared album:
- In Photos for iOS, if necessary, back out of the view until you see the Shared button at the bottom of the screen. Tap Shared and then the name of shared album. Then tap the + button in the bottom-right corner of the photo grid, select the items to add, tap Done, enter an optional comment, and tap Post.
- In Photos for the Mac, just drag photos into the shared album in the sidebar, under Shared. Or select the shared album in the Shared category, click “Add photos and videos” (near the upper right), select the items to add, and click the Add button.
It’s easy to tweak the options for your shared album or to create a public Web page for it. The process is similar in both operating systems:
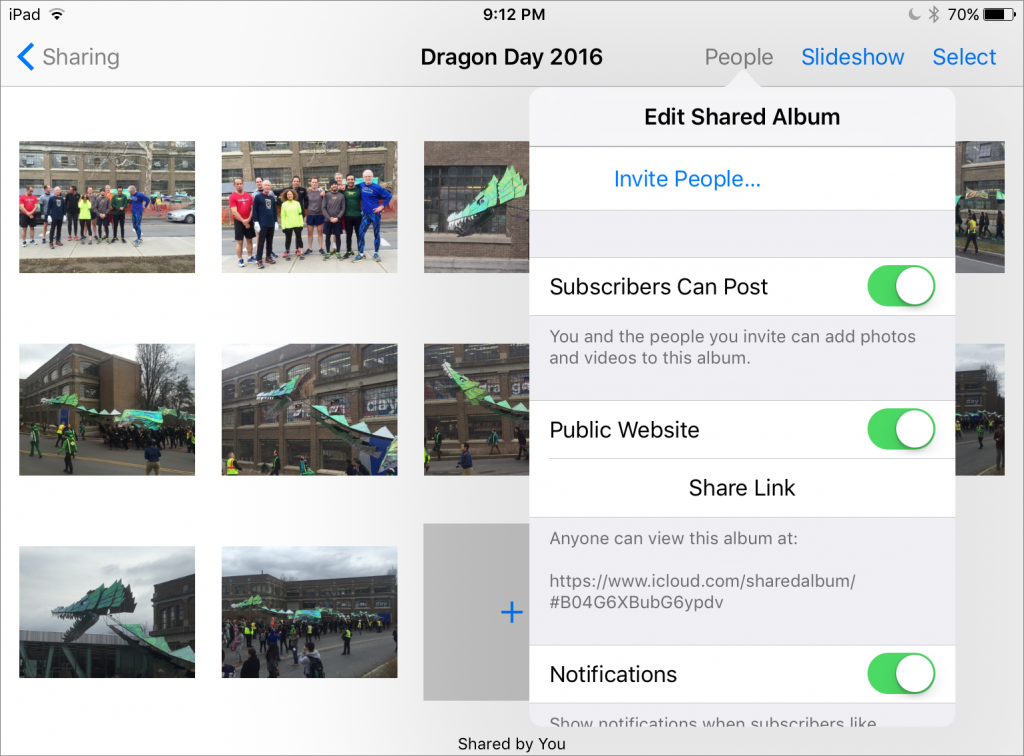
- In Photos for iOS, tap Shared at the bottom of the screen and select the shared album. Tap People to bring up a screen where you can share the album with more people, control whether subscribers can post their own photos, create a public Web page, enable notifications, and delete the album entirely. To share the URL to the public Web page, tap Share Link and select a sharing method.
- In Photos for the Mac, select the shared album in the sidebar, and then click the People
 button in the toolbar. From the popover that appears, you can do the same things as in iOS, although sharing the link is best done by either clicking it to visit it in a Web browser and copying from there or Control-clicking it in Photos and choosing Copy Link from the contextual menu.
After practicing these steps a few times, you’ll be able to create shared albums in a flash, and share them easily!
Twitter: Want to share vacation or baby photos with your family? iCloud Photo Sharing has your back—learn how to use it here:
Facebook: The best part of photos is sharing them, but if you don’t want to put them on Facebook and risk everyone seeing them, you can use iCloud Photo Sharing to create an album that you share with just a few select people. Better yet, they can add photos to it as well!